Make Your Own Valentine For A Truly Personal Message

Start with some scrap paper and make some sheets of beautiful handmade paper textured with glitter, gold thread or tiny flower petals.
Use the paper you have made to create a unique and very personal message for the one you love.
Once you have mastered the art of making handmade paper, use the technique to create other beautiful handmade paper gifts.
Handmade Valentine Card
A very personal gift of love

Handmade Paper Making Gather Your Supplies
- Waste paper in two contrasting colours for the card and Heart inset (tissue paper is an easy option for the heart colour)
- Water
- Two buckets to soak paper and hold excess pulp
- Blender to break the paper down
- Glitter, small pieces of thread, tiny flower petals to add texture to your paper
- Small jug
- Piece of corrugated cardboard cut to half A5 size or 105mm x 148mm
- Sharp knife and cutting board
- Tub/baby bath/laundry sink to hold the paper and water
- Mold and deckle A5 size or 210mm x 148cm OR Papermaking kit such as this one available in Australia from Paper-Go-Round
- Cloths/rags/kitchen wipes and a kitchen sponge
- Newspaper
- Table or bench
- Press - two boards and bricks or clamps to squeeze water out of paper
- 50cm fine gold thread
- Small gold tassel
- Sticky tape
- White A5 paper
- Glue stick
Handmade Paper Making Preparation
The day before

Trace the heart pattern onto the cardboard and cut out to leave a heart-shaped hole in the cardboard.
To grab this image just right click or control click for Mac users and Save image as.. Then you can open it in whichever application you prefer to resize and print it.
Handmade Valentine - Making The Pulp

Put some water into a tub and add some of the colour you have chosen for the card – about a 500 gram container full for every five litres of water.
Put the newspaper on the table and cover that with a couple of wet cloths smoothed out as evenly as possible.
Live Well, Love Much, Laugh Often Art Print
Lauren Hallam
Buy at AllPosters.com
Paper Making Kits To Make Your Handmade Valentines
Arnold Grummer Papermill Complete Papermaking Kit with DVD Arnold Grummer's Let's Make PaperArnold Grummer's Papermaking Kit Make paper in minutes Great for beginnersWooden Deckle Square Paper Making Kit
 Arnold Grummer's Let's Make Paper
 Arnold Grummer's Papermaking Kit Make paper in minutes Great for beginners
 Wooden Deckle Square Paper Making Kit
Make A Mold And Deckle for Paper Making and Handmade Valentines
 What you will need:
3/4″ x 3/4″ pine boards – at least 84 inches long
screen, nylon mesh, or silk screen
hand saw and miter box
rust proof staples
brass screws
wood glue
clear varnish
corner brackets
bar clamp
For instructions on making a mold and deckle visit PaperSlurry
Alternatively, you could purchase this Paper Making Kit which includes the mold and deckle pictured
Papermaking kit also available in Australia from Paper-Go-Round
Stanley TR150 SharpShooter Heavy Duty Staple Gun
Handy for Lots of Jobs Around The House Including Making Your Mold and Deckle
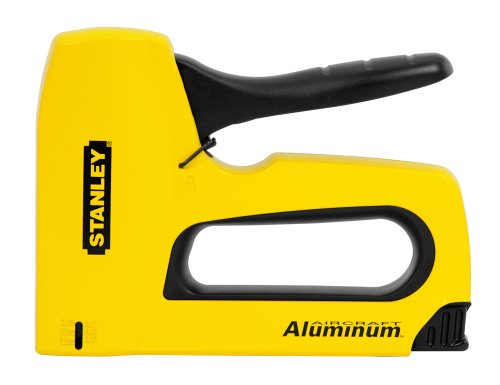
Stanley TR150 SharpShooter Heavy Duty Staple Gun
"The Stanley TR150 SharpShooter Heavy Duty Staple Gun features an
easy-squeeze handle that reduces hand fatigue, and an anti-jam mechanism
that saves time on the job. The gun's high-visibility yellow color easy
to spot in a toolbox or workshop, and its durable aircraft-aluminum
housing withstands the heavy use and abuse that you can dish out. The
staple gun delivers high power and deep penetration, and has an
easy-slide full-stick staple load for added convenience. This staple
guns uses Stanley SharpShooter TRA700 or Arrow T-50 heavy duty staples."
Use with Arrow Fastener 504M1 Genuine T50 1/4-Inch Monel Rust Proof Staples, 1,000-Pack
Use with Arrow Fastener 504M1 Genuine T50 1/4-Inch Monel Rust Proof Staples, 1,000-Pack
Hand Made Valentine - Forming The Card

The next stage is to transfer the very wet paper from the mold onto the wet cloth on the wad of newspaper. Resting one side of the frame on the edge of the cloth, slowly lower the mesh side down onto the cloth. Push firmly on all four sides or the frame. Take a kitchen sponge ond smooth it over the screen to pick up any more excess water. Carefully and slowly lift it away from the cloth by lifting one edge first.
All Hearts Beat As One Art Print
G.p. Mepas
Buy at AllPosters.com
See How Lonnie & Jacqueline Make Paper
Paper Making with Lonnie and Jacqueline
by childrenswebnetwork
Handmade Valentine - Forming The Heart
 Place the cardboard on the mesh so that the heart is
upside down and at the right of the mesh. Put some of the paper pulp you
have chosen for the heart into the jug and slowly and evenly pour it
over the heart cut-out. The water will drain through and leave the pulp
on the mesh.
Place the cardboard on the mesh so that the heart is
upside down and at the right of the mesh. Put some of the paper pulp you
have chosen for the heart into the jug and slowly and evenly pour it
over the heart cut-out. The water will drain through and leave the pulp
on the mesh.Remove the cardboard and place the meshed frame on the edge next to and lined up exactly with the card and carefully roll it over onto the card so that the heart is in the right position. Push firmly on all four sides of the frame as before, wipe over the mesh with the kitchen sponge to soak up excess water, then slowly remove the frame by lifting from one side. Cover it with another cloth, ensuring there are no wrinkles.
That is your first card – you can make as many as you want by simply repeating the process, building up a pile of cards interwoven with cloths. As you make more cards, you will need to add more pulp to the tub to maintain the correct thickness. Try to line up each card on the pile with the one underneath.
Soft Spot Art Print
G.p. Mepas
Buy at AllPosters.com
Books On The Topic Of Handmade Papermaking
The Papermaker's CompanionThe Art of Papermaking with PlantsEncyclopedia Of Papermaking And BookbindingHandmade Paper from Naturals
 The Art of Papermaking with Plants
 Encyclopedia Of Papermaking And Bookbinding
 Handmade Paper from Naturals
Handmade Valentine - Drying
 Carefully lift the whole pile of cards and cloths
(without the wad of newspaper at the bottom) onto one of the pressing
boards and put the other board on top.
Carefully lift the whole pile of cards and cloths
(without the wad of newspaper at the bottom) onto one of the pressing
boards and put the other board on top.Clamp the boards together or put bricks on top to squeeze out as much of the water as possible. It is the pressure rather than the time which is important in this stage. Stand the press on one side if possible.
Leave it until water stops dripping from it – which will take about 20 minutes.
Unclamp the press. Dry each card by separating the cloths (with the card attached) and spreading them on the ground. The drying time depends on the temperature and naturally the cards will dry most quickly in warm weather – but even in cold weather, they should dry within 24 hours.
When the cards are dry, carefully peel them from the cloths. You can re-press the dry cards if they are not flat enough.
Romeo & Juliet Art Print
G.p. Mepas
Buy at AllPosters.com
Handmade Valentine - Finishing

Very carefully fold the finished card in half. For an
extra finishing touch to make your card really special, add a gold
tassel. Because the paper is delicate, you will need to reinforce the
card’s inside fold with sticky tape. Run a few lengths of tape along the
inside fold, making sure it is not visible from the outside of the
card.
Tie the tassel onto the fine gold elastic and then tie the elastic around the spine of the card, using a small knot. Take care not to tie it too tightly, otherwise it will pull at the top and bottom of the card and tear it.
To hide the tape and knot, trim 1cm from one short and one long side of the A5 paper. Glue this over the inside of the card ready to write you message on.
Love Birds Art Print
Lora Zombie
Buy at AllPosters.com
Credits
Paper Heart – only alice’s photostream
Instructions based on an article used by permission from Paper-Go-Round.
Card designed and made by Jeanette Neave for Paper-Go-Round
Copyright Paper-Go-Round Pty Ltd All rights reserved
Instructions based on an article used by permission from Paper-Go-Round.
Card designed and made by Jeanette Neave for Paper-Go-Round
Copyright Paper-Go-Round Pty Ltd All rights reserved